
Smart Project Manager
Desktop application for comprehensive project and task management
Hierarchical system for organizing projects, tasks, and subtasks with automatic progress tracking and a dark-themed user interface.
Version 1.2.3
Smart Project Manager - desktop application for comprehensive project and task management, built with Python and PyQt5.
Provides a hierarchical system for organizing projects, tasks, and subtasks, featuring automatic progress tracking and a dark-themed user interface.
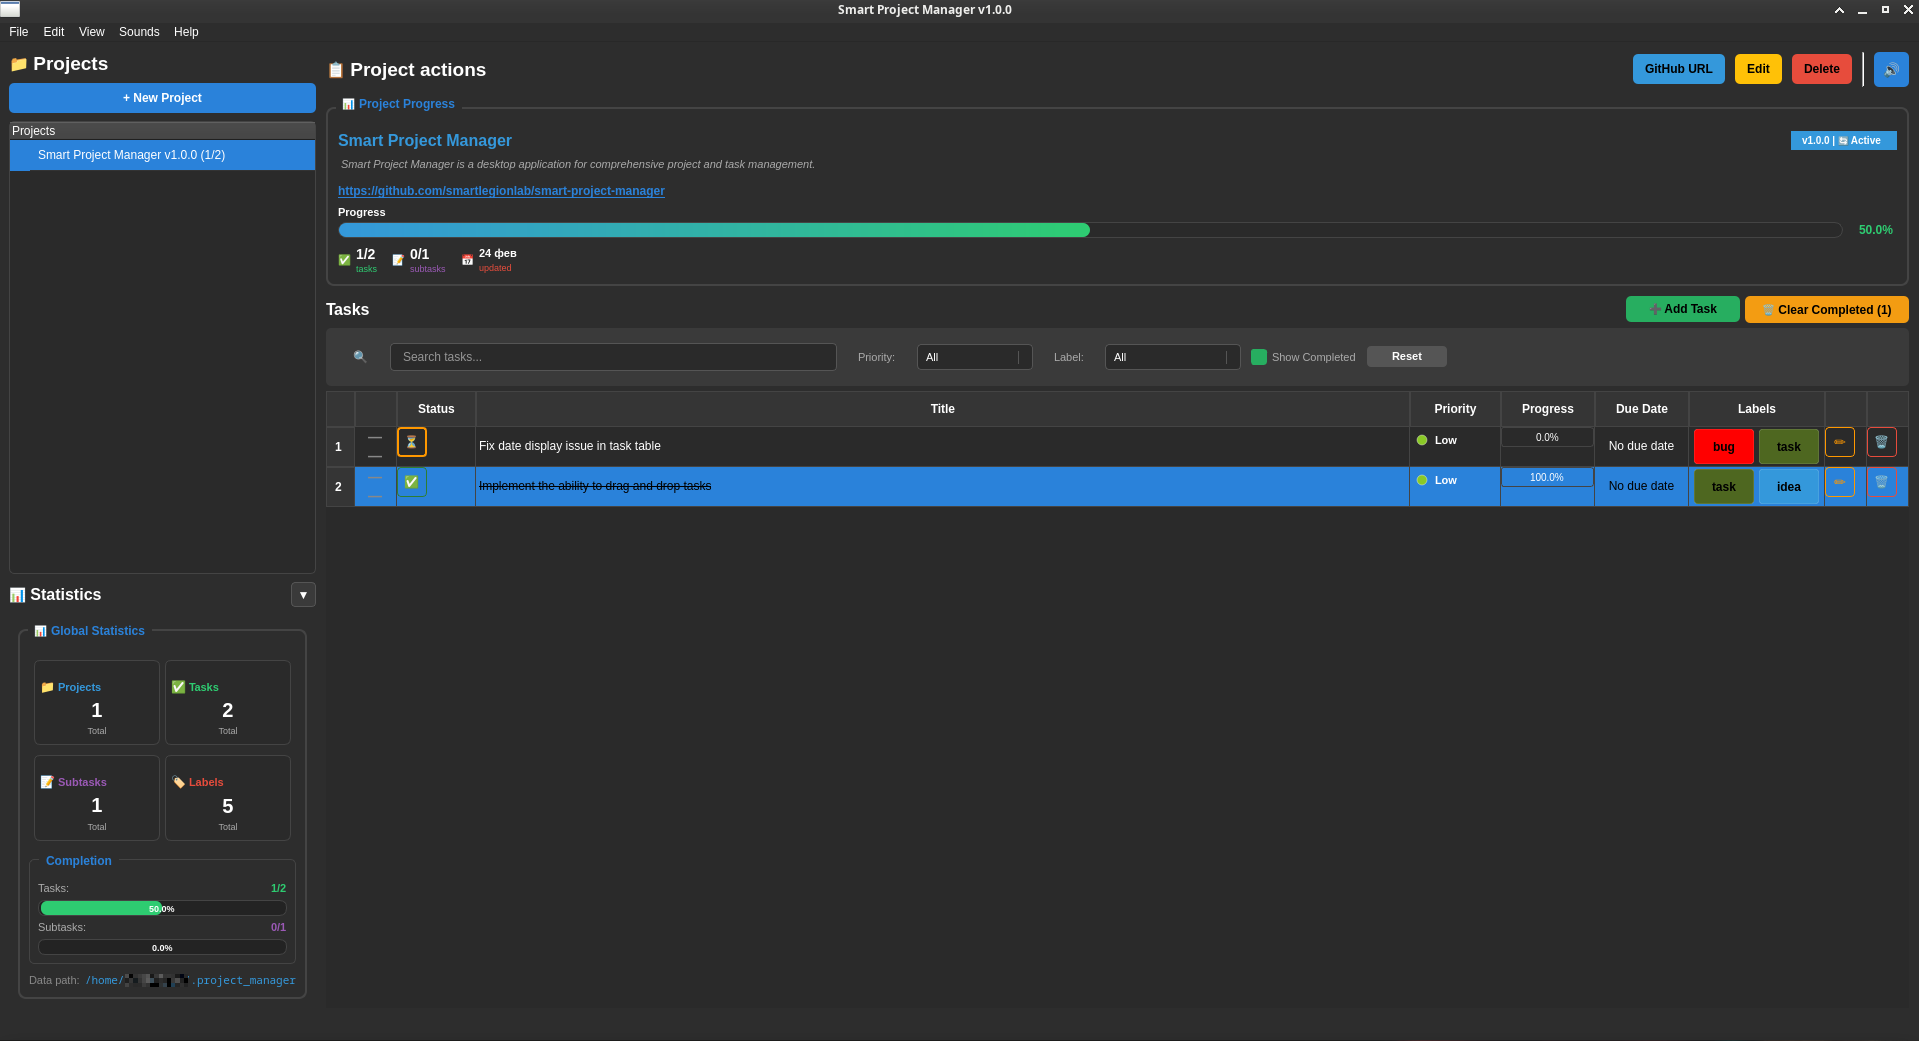
1. Three-Pane Splitter Workspace
- Left pane: project list
- Top-right: project card with status, counters and overall progress
- Bottom-right, two panes side by side: task list and the selected task with its subtasks
- Splitter handles are resizable; panes never collapse completely
- Each pane has a strict uppercase label (
PROJECTS,PROJECT,TASKS,TASK,SUBTASKS) with a live counter in parentheses
2. Project Management
- Create, edit and delete projects with name, optional description, and optional link
- The link field is available only when editing an existing project, so project creation stays minimal
- Link input is validated: a scheme (for example
https://) is required - Project name is limited to 100 characters and description to 2000 characters, with live counters
- Full CRUD for projects via context menu, Edit menu, and the project card buttons
3. Task Management
- Task list with inline visual state (status dot, title, priority, progress, due date)
- Create, edit and delete tasks
- Task title limited to 100 characters and description to 2000 characters, with live counters
- Task completion is manual: toggle the task yourself, subtask completion does not auto-complete the parent
- Clear completed tasks with the
Clear Completed (N)button in the TASKS pane - Toggle completion, edit and delete directly from the task list context menu or the task header
4. Subtasks
- Simplified subtasks: title and priority only
- Subtask title limited to 100 characters, with a live counter
- Mark as completed with a checkbox on the row, or via context menu
- Create, edit and delete subtasks
- Subtask completion does not change the parent task status
5. Progress Tracking & Statistics
- Per-project progress bar in the project card
- Per-task progress based on subtasks
- Compact global statistics panel in the status bar (always visible): projects, tasks, subtasks, and completion rates
6. Export
- Export the entire dataset to a JSON file (
File → Export...,Ctrl+Shift+S) - Import a JSON file back (
File → Import...,Ctrl+I) with automatic temporary backup - Export a single project to a Markdown document (
File → Export Project to Markdown...,Ctrl+Shift+M), or via the project context menu - The Markdown document includes the project name, description, link, creation and update dates, progress, status, all tasks with their fields, and all subtasks in a readable hierarchy
7. User Interface
- Dark theme optimized for extended use
- No decorative borders, only subtle background separation between panes
- Flat buttons, uppercase panel headers with live counters
- Context menus everywhere for CRUD actions
- Built-in Help, About and Keyboard Shortcuts dialogs accessible from the Help menu
8. Data Persistence
- Automatic saving to
~/.smart_project_manager/projects.json - JSON-based storage for projects, tasks and subtasks
- Data loaded automatically on application startup
9. Stable Selection
- Selection in all three lists is preserved across any CRUD operation
- Programmatic selection updates do not emit change signals
- A single reload path restores project, task and subtask selection consistently
- Python 3.7 or higher
- Git (only for the installer)
- curl (only for the installer)
- PyQt5
There are two independent ways to use this application:
- Run from source - clone the repo, create a virtual environment, launch manually. Nothing is installed system-wide.
- Install system-wide - one command creates a menu entry. Desktop shortcut is opt-in.
Option 1 - Run from Source (no system install)
# 1. Clone the repository
git clone https://github.com/smartlegionlab/smart-project-manager.git
cd smart-project-manager

# 2. Create a virtual environment
python3 -m venv venv

# 3. Activate it
source venv/bin/activate

# 4. Install dependencies
pip install -r requirements.txt

# 5. Launch the app
python app.py
Option 2 - Install System-Wide (recommended)
curl -fsSL https://raw.githubusercontent.com/smartlegionlab/smart-project-manager/master/install.sh | bash
What the installer does:
- Downloads the source code from GitHub.
- Installs the application to
~/.local/share/smart-project-manager/. No root, no sudo. - Creates a dedicated Python virtual environment at
~/.local/share/smart-project-manager/venv/and installs dependencies into it. - Registers the app in your desktop environment by creating
~/.local/share/applications/smart-project-manager.desktop. - Refreshes the desktop database so the menu entry appears without a full re-login on most systems.
Launch after install: Application menu → Smart Project Manager
Desktop shortcut (opt-in):
By default, no Desktop shortcut is created. This is intentional - on GNOME (default on Ubuntu), desktop icons are hidden by default, which would make a shortcut invisible and confusing. To also create a Desktop shortcut during install, pass the SPM_CREATE_DESKTOP_SHORTCUT=1 environment variable to bash - the second command in the pipeline:
curl -fsSL https://raw.githubusercontent.com/smartlegionlab/smart-project-manager/master/install.sh | SPM_CREATE_DESKTOP_SHORTCUT=1 bash
Or export it first, then run the normal installer:
export SPM_CREATE_DESKTOP_SHORTCUT=1
curl -fsSL https://raw.githubusercontent.com/smartlegionlab/smart-project-manager/master/install.sh | bash
Note: Writing SPM_CREATE_DESKTOP_SHORTCUT=1 curl ... | bash does not work - in a shell pipeline, an environment variable prefix applies only to the command on the left side of the pipe. Pass it to bash directly, or export it beforehand.
Notes:
- On GNOME (default on Ubuntu), desktop icons may be hidden by default. Enable Desktop Icons in GNOME Tweaks to see the shortcut.
- The Desktop shortcut may show an "Unsecured Application Launcher" warning. Right-click → Allow Launching (one-time action).
- If the menu entry does not appear immediately, log out and back in.
Alternative - install from a cloned repo
cd smart-project-manager
./install.sh
It works the same way. It ignores any local venv/ and creates its own under ~/.local/share/smart-project-manager/venv/.
Uninstall:
curl -fsSL https://raw.githubusercontent.com/smartlegionlab/smart-project-manager/master/uninstall.sh | bash
What the uninstaller removes:
~/.local/share/smart-project-manager/- the application and its venv~/.local/share/applications/smart-project-manager.desktop- the menu entry~/Desktop/smart-project-manager.desktop- the Desktop shortcut (if present)
What the uninstaller never touches: ~/.smart_project_manager/projects.json - your projects, tasks and subtasks. It is your data. Only you decide what to do with it.
If you want to remove your data as well, run after uninstall:
rm -rf ~/.smart_project_manager
Installation Paths:
| Item | Path |
|---|---|
| Application files | ~/.local/share/smart-project-manager/ |
| Virtual environment | ~/.local/share/smart-project-manager/venv/ |
| Application menu entry | ~/.local/share/applications/smart-project-manager.desktop |
| Desktop shortcut (opt-in) | ~/Desktop/smart-project-manager.desktop |
| User data (projects) | ~/.smart_project_manager/projects.json |
Note: If you installed the app via install.sh, the application menu entry is already created automatically. The in-app option described below is useful when you run the app manually from a custom location, or when you want to add a Desktop shortcut on demand. It is also the recommended way for development: it creates a shortcut pointing to the currently running instance (your working copy), not to a copy under ~/.local/share/.
Creating Application Shortcuts:
- Go to File → Create Desktop Entry
- Choose locations: Application Menu (
~/.local/share/applications/) and/or Desktop (~/Desktop/) - Click Create Entry
After creation:
- Application Menu: Log out and back in (or restart desktop) for entry to appear
- Desktop shortcut: May show "Unsecured Application Launcher" warning - right-click → "Allow Launching" or "Trust" (one-time action)
Note: This feature is only available on Linux systems with desktop environments that support .desktop files (GNOME, KDE, XFCE, etc.).
Getting Started
- Create a project:
File → New Project(Ctrl+N) or the + New button in thePROJECTSpane. Enter a name and, optionally, a description. The link field becomes available later, when you edit the project. - Select a project: click it in the
PROJECTSlist on the left. The project card in the top-right and the task list in the bottom-left update automatically. - Create a task: with a project selected, use
File → New Task(Ctrl+T) or the + Add button in theTASKSpane. - Select a task: click it in the
TASKSlist. TheTASKheader and theSUBTASKSlist update automatically. - Create a subtask: with a task selected, use
File → New Subtask(Ctrl+Shift+T) or the + Add button in theSUBTASKSpane. Fill in title and priority.
Workspace Layout
- The window is split into three logical areas, each with its own header.
- The vertical splitter on the left separates the project list from the workspace.
- The workspace is split vertically into the project card (top) and the task/subtask area (bottom).
- The task/subtask area is split horizontally into the task list (left) and the selected task with its subtasks (right).
- All splitter handles are draggable. Panes never collapse completely, so you cannot accidentally hide the project list or the task list.
Projects
- Name is limited to 100 characters and description to 2000 characters. Both have live counters in the dialog.
- The optional link is only shown in edit mode. It is validated: a scheme such as
https://is required. - The project card shows the name, description, optional link, status badge, and five tiles:
TASKS,SUBTASKS,PROGRESS,CREATED,UPDATED. - Full CRUD: context menu in the project list,
Edit → Edit Project(Ctrl+E),Edit → Delete Project(Ctrl+D), and theEdit/Deletebuttons on the project card. - Right-click a project and choose Export to Markdown... to save it as a Markdown document.
Tasks
- Title is limited to 100 characters and description to 2000 characters. Both have live counters in the dialog.
- The task list shows a status dot, the title, the priority, the progress and the due date.
- Task completion is manual. Click the toggle button in the
TASKheader, or right-click in the list and chooseMark as Complete/Mark as Pending. Subtask completion does not auto-complete the parent task. - The
Clear Completed (N)button in theTASKSpane removes all completed tasks in the current project after a confirmation prompt. - Full CRUD: context menu in the task list,
Edit → Edit Task(Ctrl+Shift+E),Edit → Delete Task(Ctrl+Shift+D), and the buttons in theTASKheader.
Subtasks
- Subtasks are simplified: title and priority only.
- Title is limited to 100 characters, with a live counter in the dialog.
- Mark a subtask complete with the checkbox on the row, or via the context menu.
- Full CRUD: context menu in the
SUBTASKSlist, or + Add in theSUBTASKSpane header. - Subtask completion does not change the parent task status.
Export
- Export to JSON:
File → Export...(Ctrl+Shift+S) writes the whole dataset (projects, tasks, subtasks) to a single JSON file. - Export project to Markdown:
File → Export Project to Markdown...(Ctrl+Shift+M), or right-click a project in the list and choose Export to Markdown.... Saves the selected project as a readable.mddocument with name, description, link, dates, progress, status, all tasks and their subtasks.
Stable Selection
- Selection in the three lists is preserved across every CRUD operation.
- Select a project, select a task, then create a new subtask. The task and project selections stay in place.
- Select a project, select a task, switch to another project, then come back. The previously selected task is restored.
- Toggle a task or subtask. The corresponding row remains selected.
| Shortcut | Action |
|---|---|
Ctrl+N | New project |
Ctrl+T | New task in the current project |
Ctrl+Shift+T | New subtask in the current task |
Ctrl+E | Edit current project |
Ctrl+D | Delete current project |
Ctrl+Shift+E | Edit current task |
Ctrl+Shift+D | Delete current task |
Ctrl+I | Import JSON |
Ctrl+Shift+S | Export JSON |
Ctrl+Shift+M | Export current project to Markdown |
F5 | Refresh view |
F1 | Open help |
Ctrl+/ | Show keyboard shortcuts dialog |
Ctrl+A | Open about |
Ctrl+Q | Exit application |
| Item | Path |
|---|---|
| Projects | ~/.smart_project_manager/projects.json |
Data Format Notes:
projectsentries may containlink(optional string).subtasksentries contain onlyid,title,priority,completed,task_id,project_id, and timestamps.- Older data files with
labelson tasks still load correctly; thelabelsfield is ignored on import. - Exports from this version no longer include
labelsin the data. - Markdown export is read-only and does not affect the stored JSON data.
By using this software, you agree to the full disclaimer terms.
Software provided "AS IS" without warranty. You assume all risks.
Full legal disclaimer: See DISCLAIMER.md
License: BSD 3-Clause License